Stardew Valley: Farming
Skill Bonuses, Crop Quality, and Professions
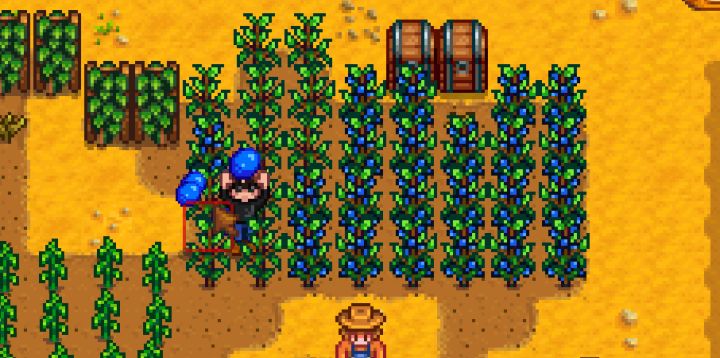 Harvesting produce is very satisfying, especially after all that watering. Some crops (such as blueberries) can produce multiple fruit in a single harvest.
Farming is a nearly essential activity in Stardew Valley due to its huge potential for income and the useful crafting structures unlocked via leveling the skill. Farming is probably the most effective way to make money early on, in combination with other activities like foraging and fishing. The best part is that for the majority of the time you only need to water your plants, then wait on the return - what else you do with your farmer's day is up to you. This guide to farming in Stardew Valley will teach you a bit about how growth times and plant quality work, what you can expect when seasons change, the best skill bonuses to take at farming level 5 and 10, and how to get sprinklers going on your farm.
Farming Skill Experience
As you use the Farming skill - via harvesting crops or collecting from animals, you'll gain farming skill experience. The more valuable the item, the more experience will be gained - so nothing is lost by growing slower crops. Each level unlocks new buildings, professions, and increases your farmer's proficiency with both the hoe and watering can. Proficiency improves the energy consumption of using these items. Improved levels are mainly about the unlocks.
Farming Skill Unlocks
- Level 1 - Scarecrow (protect crops from crows), Basic Fertilizer (improve plant quality)
- Level 2 - Mayonnaise Machine (for use with Eggs), Stone Fence, Sprinkler (auto-water plants)
- Level 3 - Bee House (generates honey), Speed-gro fertilizer (improve crop growth rate), Farmer's Lunch (recipe)
- Level 4 - Preserves Jar (make jam), Basic Retaining Soil (keeps plant watered), Iron Fence
- Level 5 - Choose between Rancher and Tiller Professions
- Level 6 - Cheese Press (for making cheese), Hardwood Fence, Quality Sprinkler
- Level 7 - Loom, Quality Retaining Soil
- Level 8 - Oil Maker, Keg (for making ale & wine), Deluxe Speed-Gro fertilizer
- Level 9 - Seed Maker, Iridium Sprinkler, Quality Fertilizer
- Level 10 - Choose 2nd Profession for Rancher or Tiller - Coopmaster/Shephered or Artisan/Agriculturist
How to Start a Farm
In order to start a farm, you'll need to have the hoe, watering can, and some seeds ready. Use the hoe to make rows 3 blocks wide and plant the seeds by using them on the tilled ground. You can now water them. If you run out of water, head to the pond and use the watering can to fill up. I prefer planting early crops in 3x10+ rows so that it's easy to water them with the level 1 watering can. Stand in the center, water nine blocks, move a few spaces over and repeat the process until they're all watered. Plants must be watered each day in order to grow, even those plants that repeatedly produce upon maturity (such as hops and grapes). Not watering will stall them, so try not to miss any spots.
Season Changes & Grow Times
When and what to plant depends on the time of year. Each season is 28 days. If it is the 23rd and you are planning to plant potatoes (grows in 6 days), they will not make it to maturity before the season rolls over. The potatoes would be ready on the 29th, which doesn't exist. They'll die, and you'll lose the financial investment. If a plant takes four days to mature and it is the 23rd, it will be done on the 27th - you're counting from zero. For a one-time harvest, plants that repeatedly produce fruit/vegetables are, in general, less profitable than those that can be picked only once, so it'd be better to plant something that is a one-time boost when it's near the end of a season. Crops that last all season (or multiple seasons as in the case with corn) are highly profitable when planted early.
Improving Your Farm
To really get your farm going quickly, take the money you earn from your first batch of crops and reinvest it into seeds purchased from the store in town (two screens east of your farm, at Pierre's). This lets you multiply your money. When you have nothing else to do, it's not a bad idea to clear areas of the farm. You need both stone and wood to get going with buildings and crafting, and eventually hope to happen upon some coal (found in the mines after day 5) to make a scarecrow.
You can sell crops by going to the store or get the money automatically overnight by heading to the bin next to the house. Anything you put in there will be sold the following morning. By reinvesting your money into crops, you can grow a farm too large for the normal watering can. You are better off growing more expensive crops than many dozens of smaller ones, because of the energy usage and that there are only so many hours in a day.
Toward the end of your first season, start to save up for purchasing seeds for the next. Pierre's stock will change to Summer seeds, and you can get your hands on hops, corn, and other fruits and vegetables that produce all season. Corn actually lasts into fall and is a very smart long-term investment, though fast cash can be made with other crops (including flowers) to help kick-start your business.
Watering Can
Because of its positive effect on money-making potential, upgrading the watering can is one of the first major things you should do in Stardew Valley - probably by the end of the first or second season. More than 100 or so plants gets tedious without a better can or numerous sprinklers installed, and that is not something you can do until later once you have access to iron. Upgrading the watering can helps, but you need to do that when you are either at the end of a season, have rain the next day, or don't have any crops to water. This is because it takes two full days to get the upgraded can returned to you.
All watering cans past the default have a special ability that grows in strength with each additional upgrade. When the use button is held to charge it up, they will water more tiles at once. You can plan the layout of your farm around these specials - the bronze watering can is able to do 3 tiles in front of the player. Additionally, the upgraded watering cans help immensely as they hold more units of water. Clint the blacksmith can upgrade the watering can for you, note it takes both money and metal bars on hand. Bars require you to craft a furnace, and the required ore can be found in the mine.
Scarecrows
Scarecrows are an essential part of a farm, and thankfully do not take many resources to craft. This can be found under the crafting menu accessed with ESC. A scarecrow protects the 8 surrounding tiles from crows, and will help your income by preventing loss of crops. Because you can make these at farming level 1 and getting your hands on a piece of coal or two is not hard, it's highly recommended. You can move scarecrows by using the hoe to uproot it then place it in a new spot. Try to count out the range so that all your crops are covered. Well-spaced, two scarecrows can protect a fairly large plot.
Fertilizer
You can begin utilizing fertilizer very early, as it only takes sap that you can get from chopping down trees. Head into the menu, go to the crafting tab, and you'll find it's only a couple sap to make 1 fertilizer. You must use fertilizer before planting seeds. Fertilizer raises the odds that produce will be silver or gold-star quality, which boosts the sell value, and lasts until the season is over (meaning you can use it for multiple plant/grow cycles).
There are other types of fertilizer, however. One makes the plant more likely to retain water and the other increases growth times by a percentage. Because of the effect on income and the crafting of other goods, the quality-boosting fertilizer is recommended for any plants that can be harvested multiple times. Speed boosts will not affect crops beyond the first harvest. Quality-boosting fertilizer types are also easiest to craft. The water retaining fertilizer being unreliable is an issue for me, personally, because it can be a headache figuring out which plants are not watered in a large garden. Also, with the ability to upgrade watering cans and deploy sprinklers, watering the plants becomes a non-issue.
Planting and Growing Fruit Trees
Stardew Valley lets you plant apple and other types of fruit trees which grow all year round but only put out produce one season per year. This means 28 harvests per year per tree. Fruit Trees require 2 spares in all directions to be clear, so they must be planted with 2 empty squares between them (TXXTXXTXXT) with the same amount of space on a horizontal level. The game won't normally let you plant them too close together. Fruit trees give one fruit each day. Large orchards are expensive to set up due to the saplings costing thousands each but are certainly a nice thing to have around because of their low maintenance. The cost means it takes quite some time for them to pay off, regardless of when they're planted. Fruit trees start producing gold star produce as they age and fertilizer is not needed, nor tilling of the ground. An old orchard can be quite a money-maker but will take up a lot of space!
Crops to Grow for Bundles
For many people, completing the community center bundles to get rewards will be a major objective at some point. To assist with that, I've created a list of crops to grow for completing bundles, sorted by season. This is helpful, as if you miss just a couple of plants you may have to wait a full year to get another chance to complete the bundle. Using this, it should be possible to complete farming-related bundles by Summer-Fall Year 2.
Farming Professions: Tiller vs Rancher
At level 5 in farming, you will get to choose the first of two professions. At level 10, the first choice leads to a second pair of choices. Your options are:
Tiller Profession
Choosing Tiller is recommended, because it affects more income streams. Crops will be worth 10% more with the tiller choice. At level 10 farming you can pick Artisan or Agriculturist. Agriculturist makes crops grow 10% faster (though it's reportedly bugged to be faster in 1.07). By far superior, Artisan will make artisan goods be worth 50% more than normal - meaning if you can setup a number of cheese presses, kegs, etc. you can make more off both your livestock AND produce. This is why I recommend tiller - it has a broad effect, while the others are much more specialized.
Rancher Profession
Animal products are worth 10% more. At level 10 in farming you can choose between the Shepherd and Coopmaster professions. Shepherd lets you befriend barn animals faster, and sheep will produce wool faster. Coopmaster lets you befriend coop animals faster and incubation times are reduced to half. As you can see ths is quite narrow compared to tiller, though you certainly won't lose out entirely if you love your chickens.
Crops List
While I haven't made a master crops list yet, I have written about profit per day for the three seaons with the plants ranked in order of profit.
- All Crop Prices and Profit
- Spring Crops
- Summer Crops
- Fall Crops
- List of Stuff to Keep for Bundles (including Crops)
